Header Section
Follow these steps to configure and customize the Header section in your Emoll Shopify theme:
1. Access the Header Settings
- Log in to your Shopify Admin Dashboard.
- Go to Online Store ? Themes.
- Click Customize on your active theme.
- In the left sidebar, click on Header section.
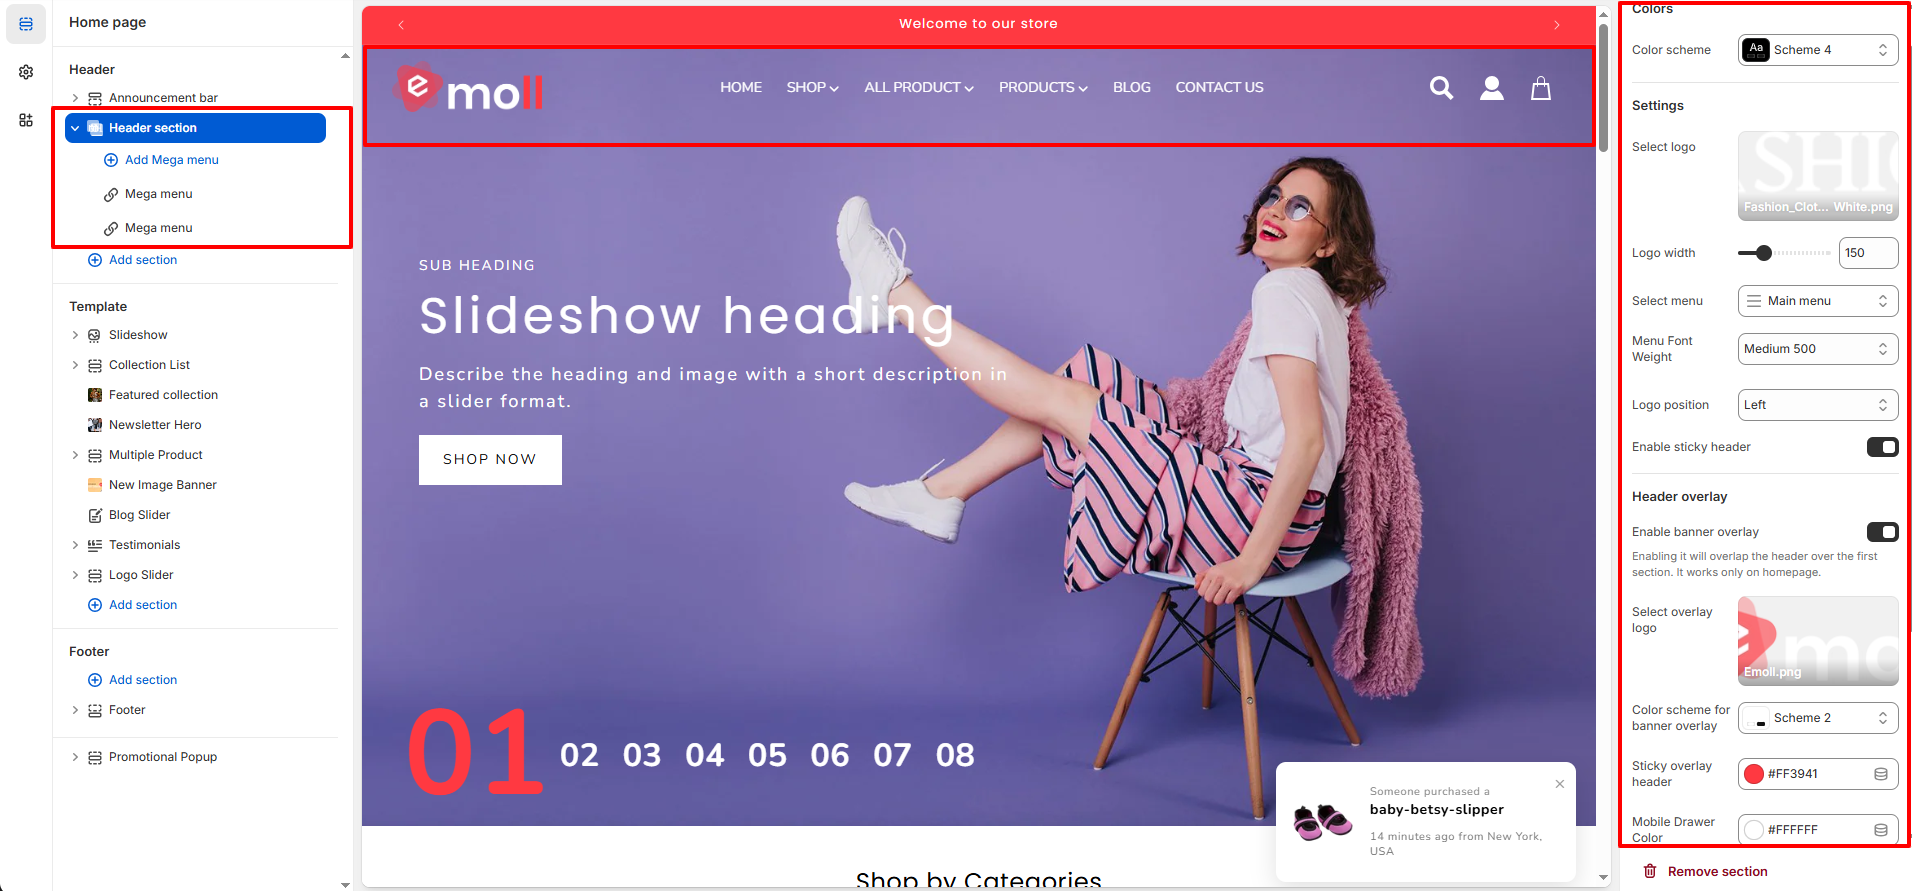
2. Basic Header Settings
- Color Scheme: Select your preferred header color scheme.
- Select Logo: Upload or choose your store logo image.
- Logo Width: Adjust the logo size using the width slider.
- Select Menu: Choose the navigation menu (e.g., Main Menu).
- Menu Font Weight: Set the font weight for menu items.
- Logo Position: Choose logo alignment (Left / Center).
- Enable Sticky Header: Enable this option to keep the header fixed while scrolling.

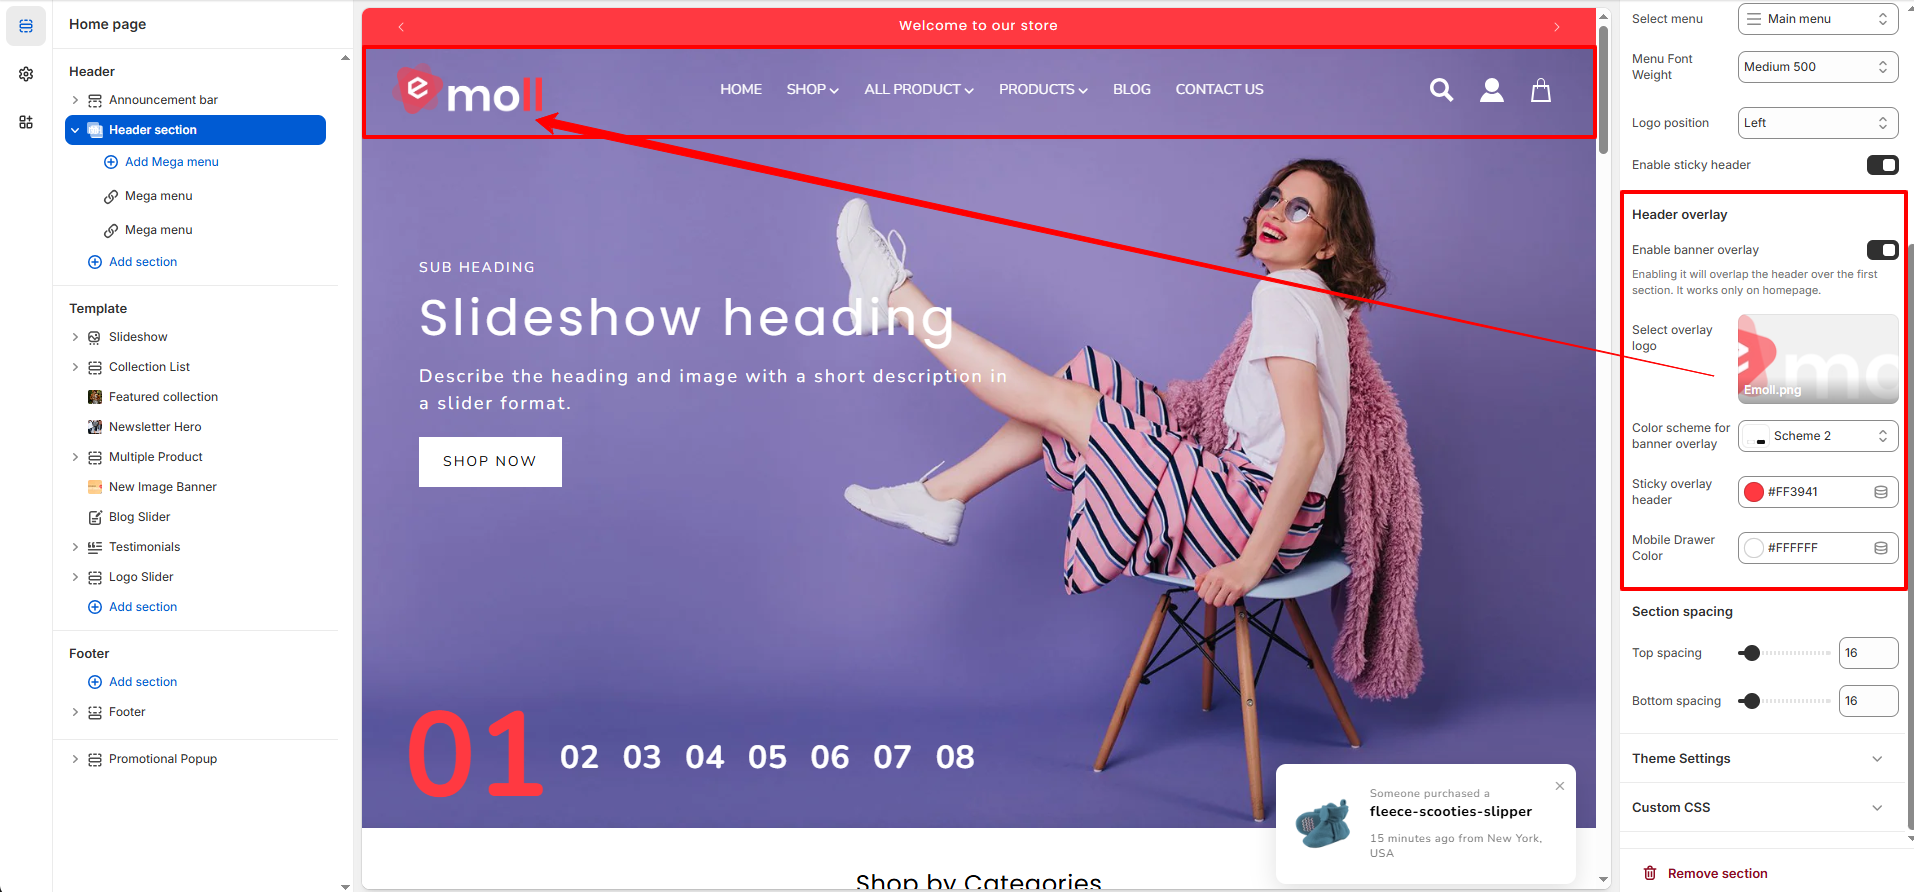
3. Header Overlay Settings
- Enable Banner Overlay: This option overlaps the header over the first section (works only on homepage).
- Select Overlay Logo: Choose an alternate logo for overlay mode.
- Color Scheme for Banner Overlay: Select a separate color scheme for overlay header.
- Sticky Overlay Header Color: Set background color for sticky overlay header.
- Mobile Drawer Color: Customize the mobile menu drawer background color.
4. Menu Types in Emoll Theme
- The Emoll theme provides two types of navigation menus:
- 1. Standard Dropdown Menu � Default Shopify dropdown navigation.
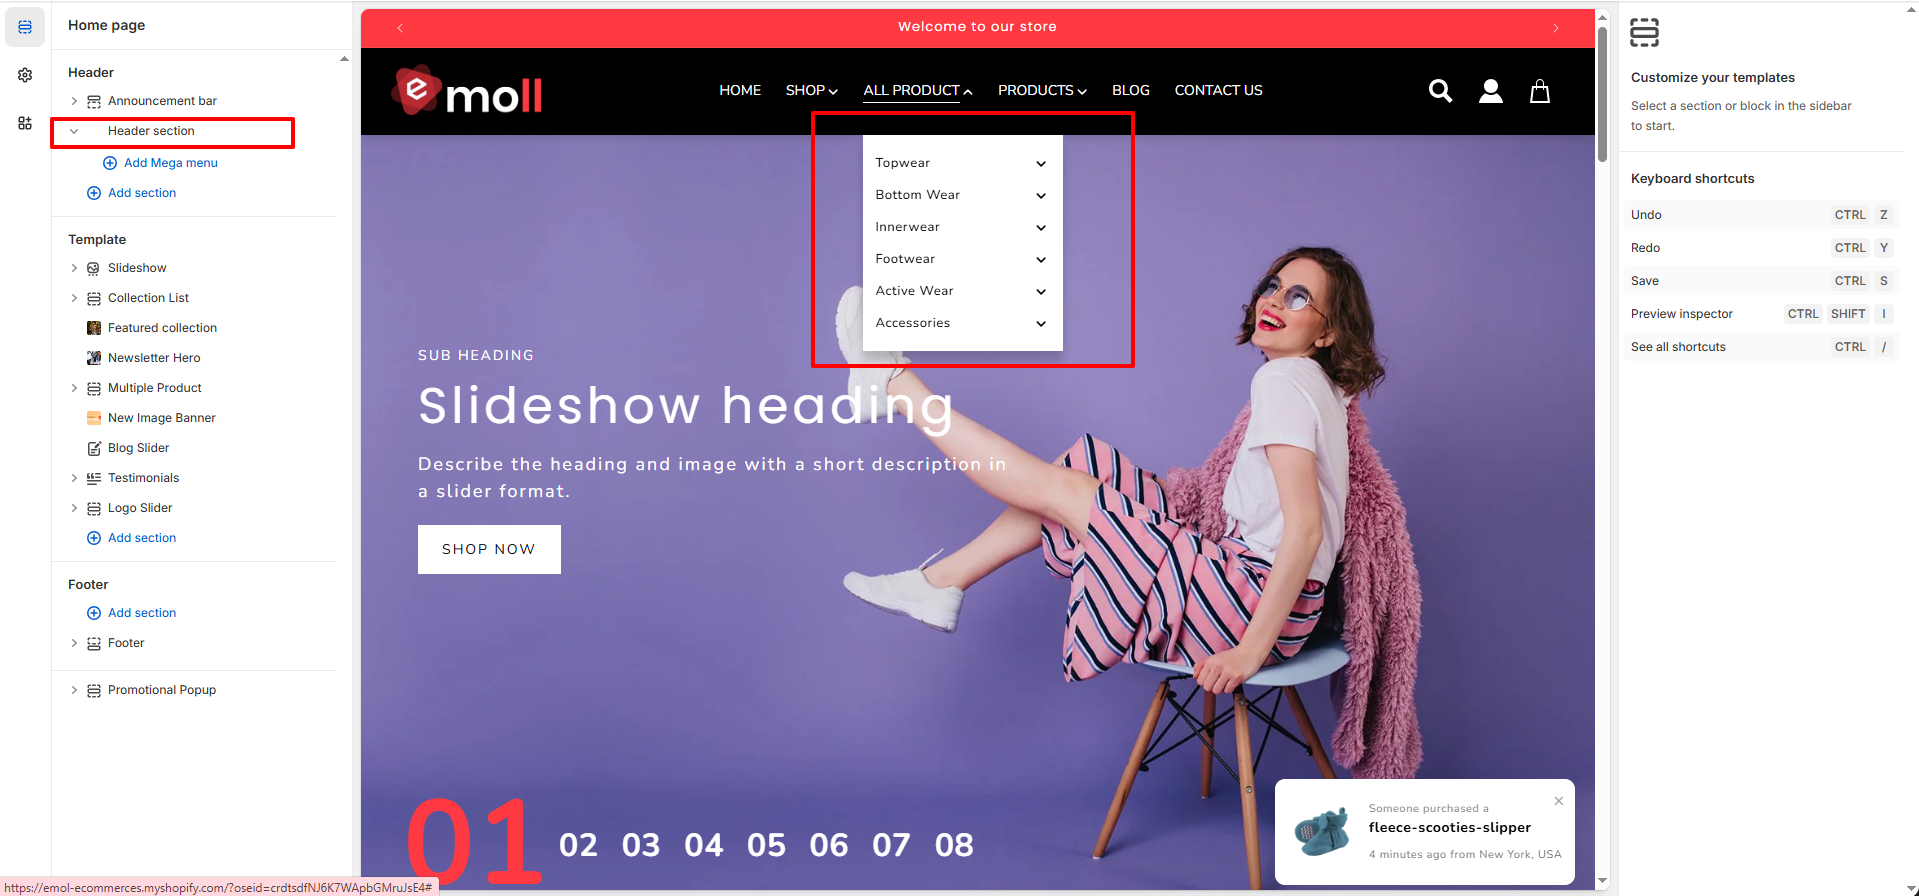
- 2. Mega Menu � Advanced multi-column menu layout.
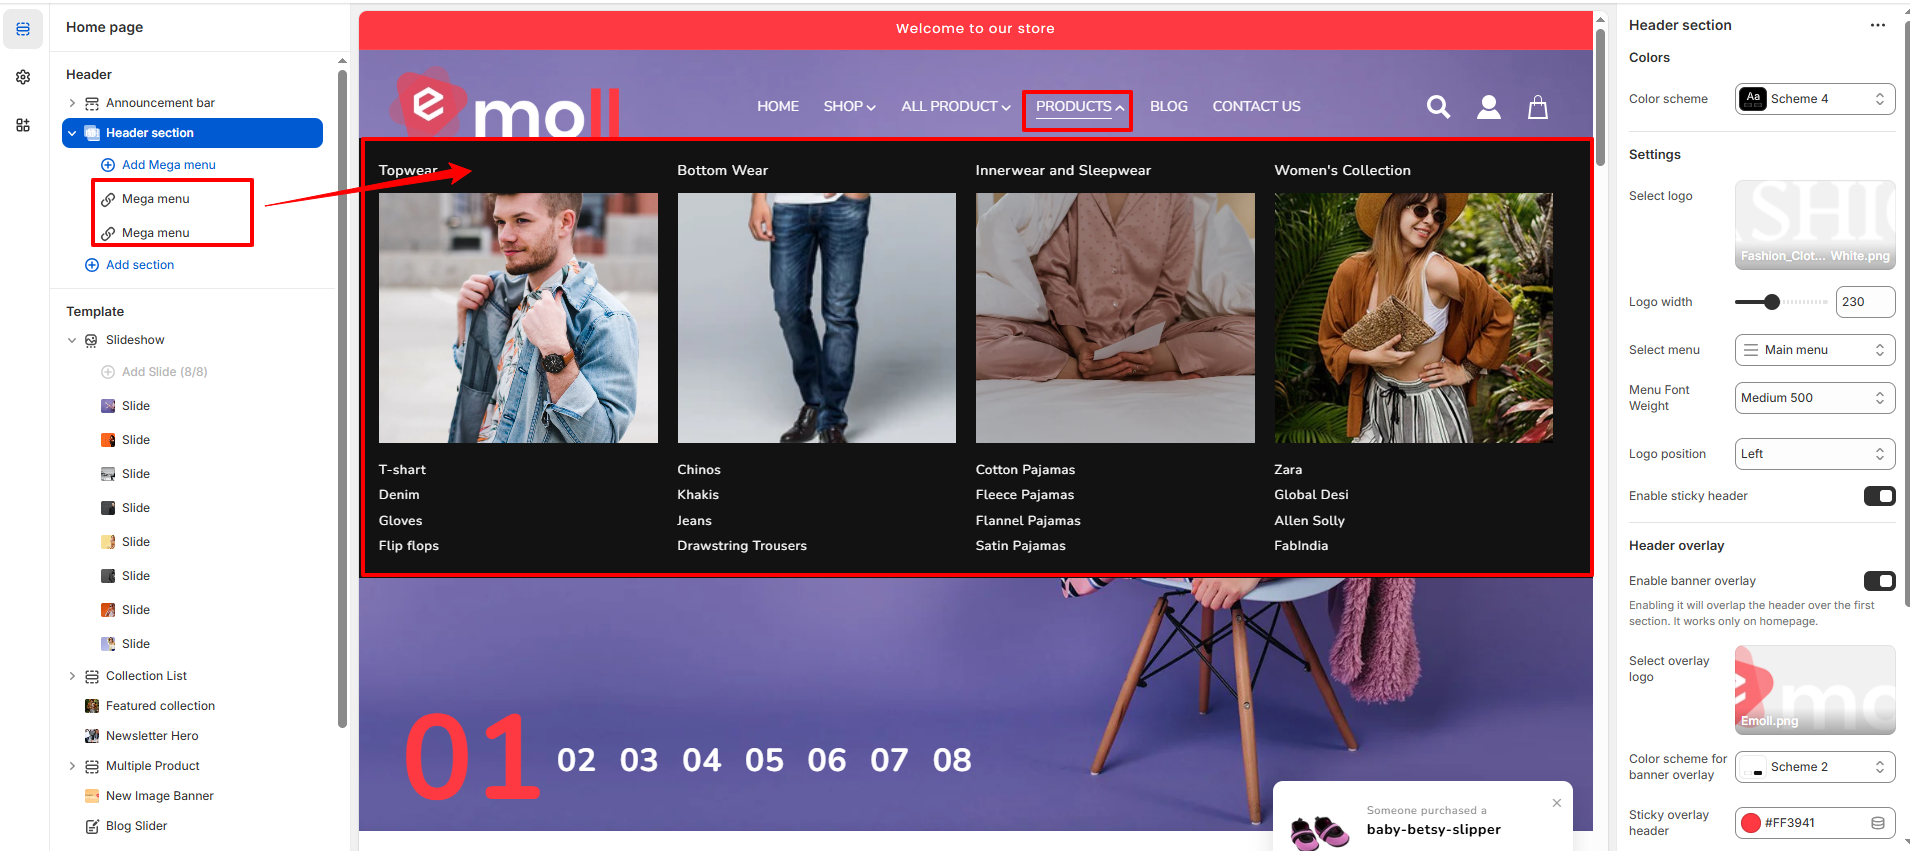
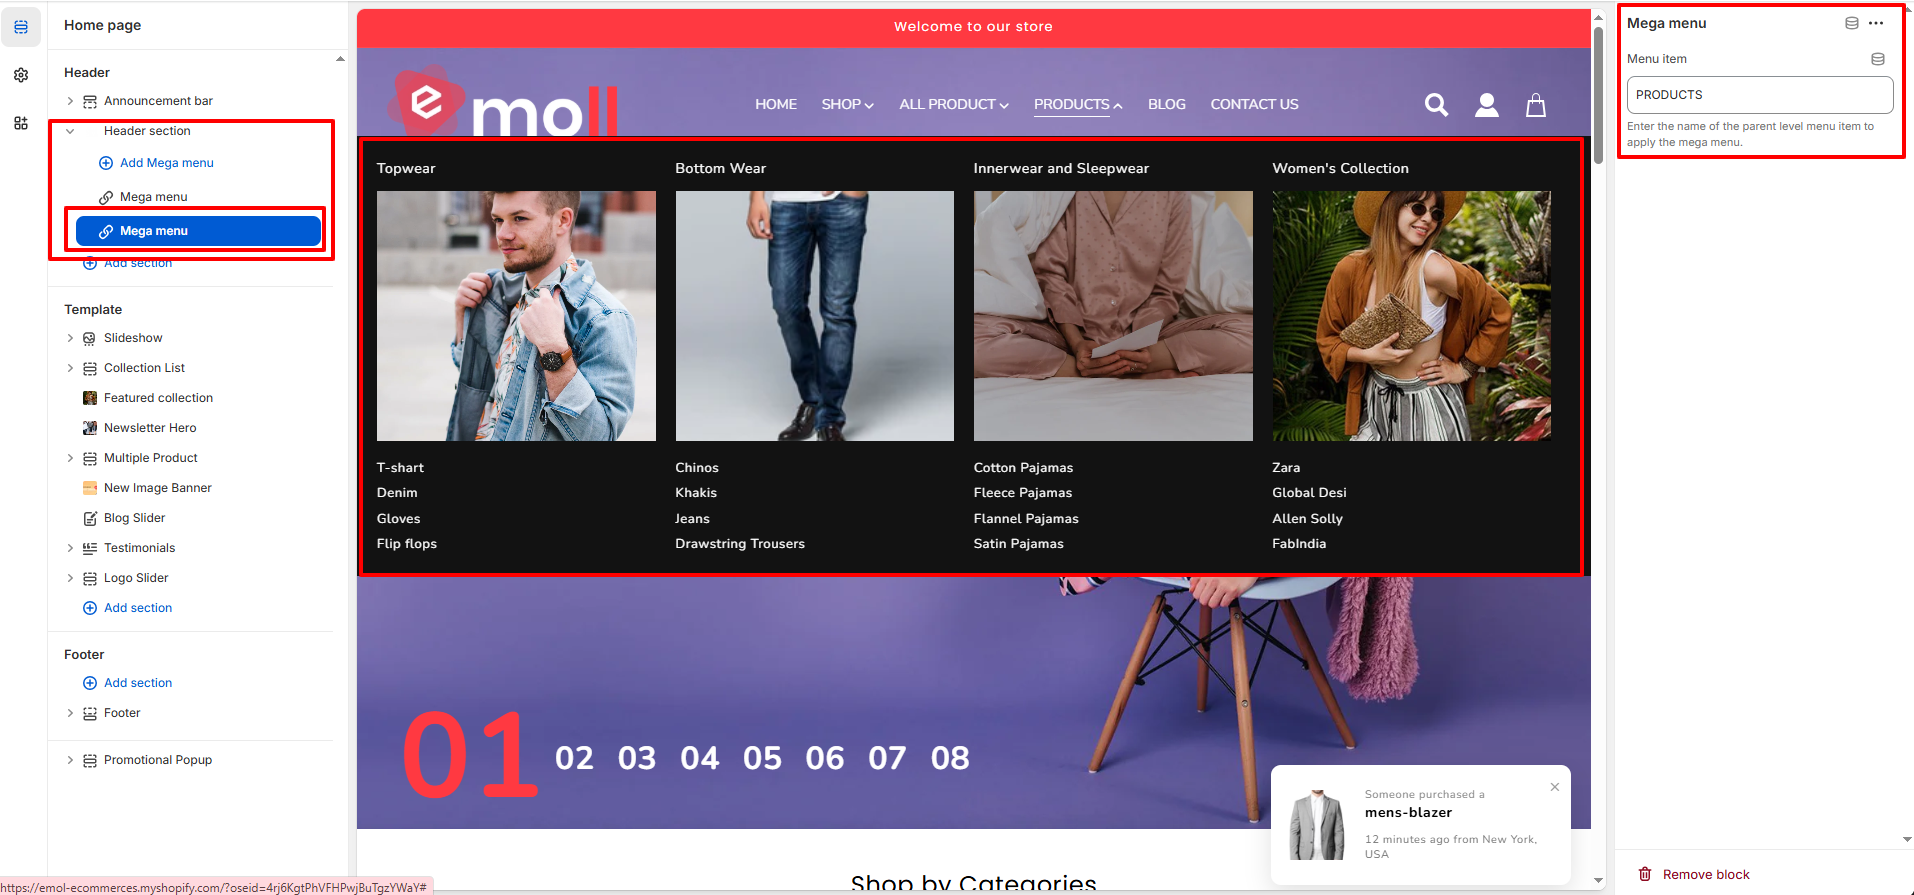
5. How to Add a Mega Menu
- Open Header section in the theme customizer.
- Click Add Mega Menu block.
- Enter the Navigation Item Name exactly the same as your menu item name (example: Shop).
- Make sure the navigation item name matches exactly with your Shopify menu item.
- Once matched, the Mega Menu will automatically replace the default dropdown for that item.
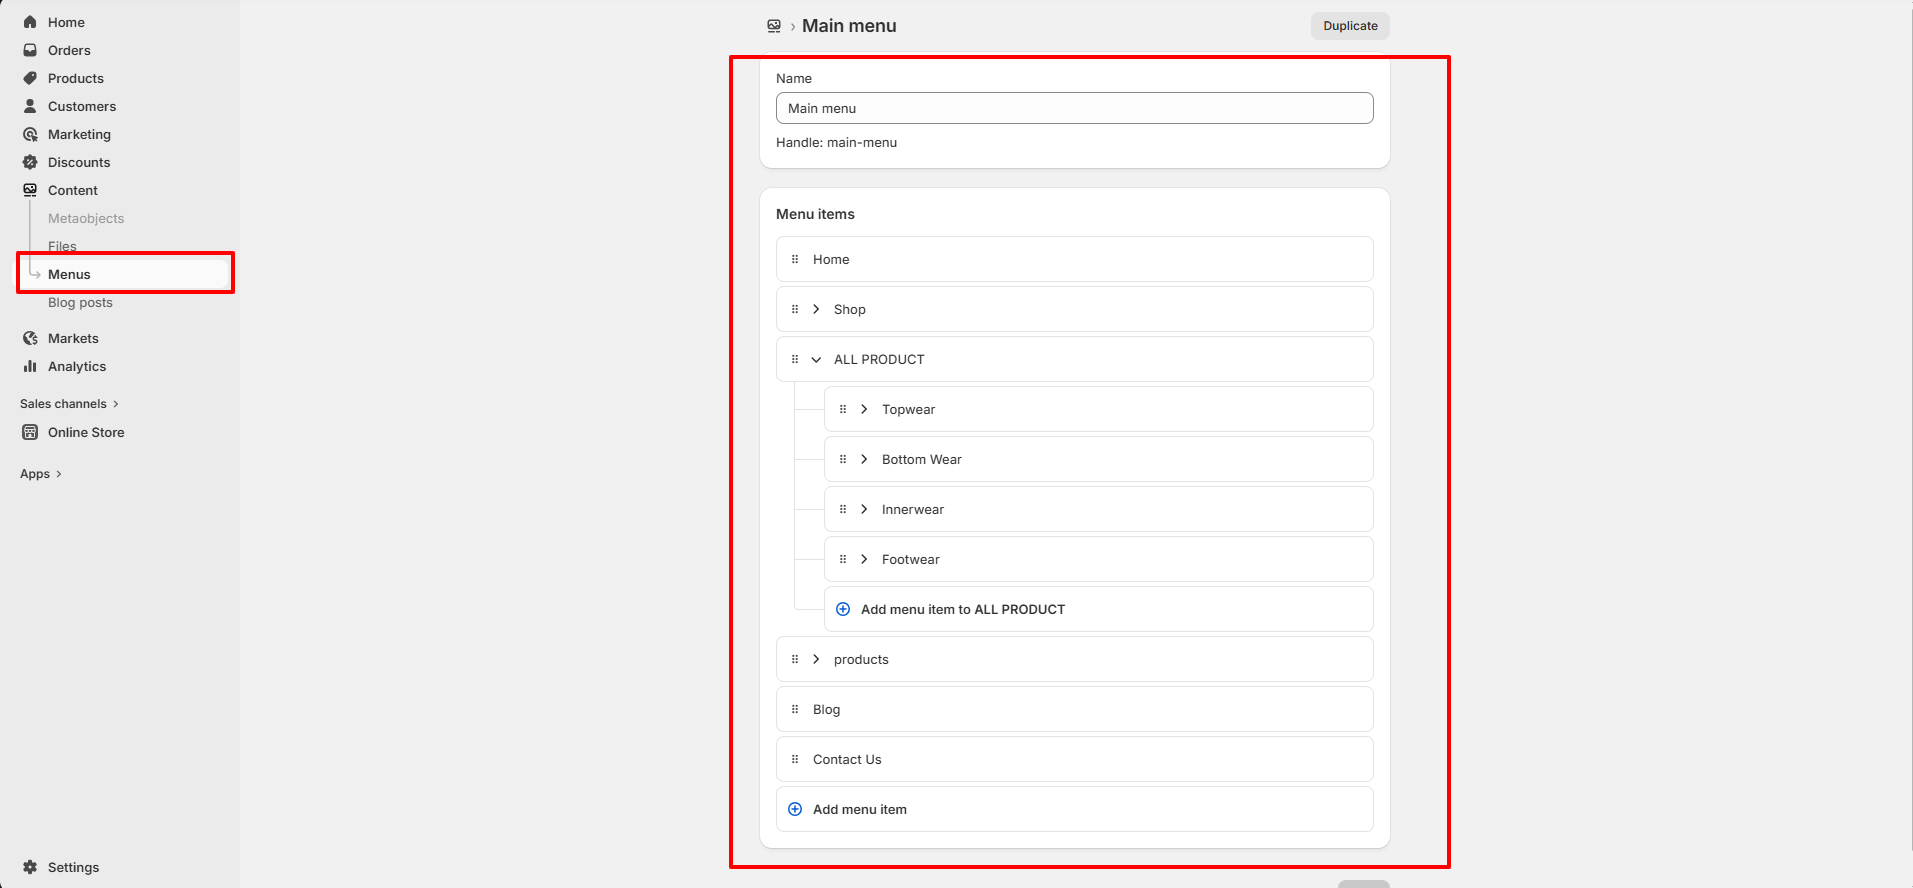
8. Follow these steps to configure your theme menu (Dropdown or MegaMenu)
- Go to your Shopify Admin Dashboard.
- Navigate to Online Store ? Content ? Menus.
- Click on Main Menu (or the menu assigned in Header settings).
- Inside the selected menu (e.g., Main Menu), click Add Menu Item.
- Enter the menu name (example: Shop).
- Select the appropriate link (Collection, Product, Page, or URL).
- To create a dropdown, drag a menu item slightly to the right under a parent menu item.
- This creates a nested (child) item which appears as a dropdown in the header.
- Click Save Menu after finishing.
6. Important Notes
- If the navigation item name does not match correctly, the mega menu will not appear.
- You can add multiple Mega Menu blocks for different navigation items.
- If no Mega Menu block is assigned, the theme will display the default dropdown menu.
- Always click Save after making changes.