Blog Section
Follow these steps to configure and customize the Blog page in your Emoll Shopify theme:
1. Access the Blog Page Settings
- Log in to your Shopify Admin Dashboard.
- Go to Online Store ? Themes.
- Click Customize on your active theme.
- From the top dropdown, select Blog template.
- Click on the Blog section in the left sidebar.
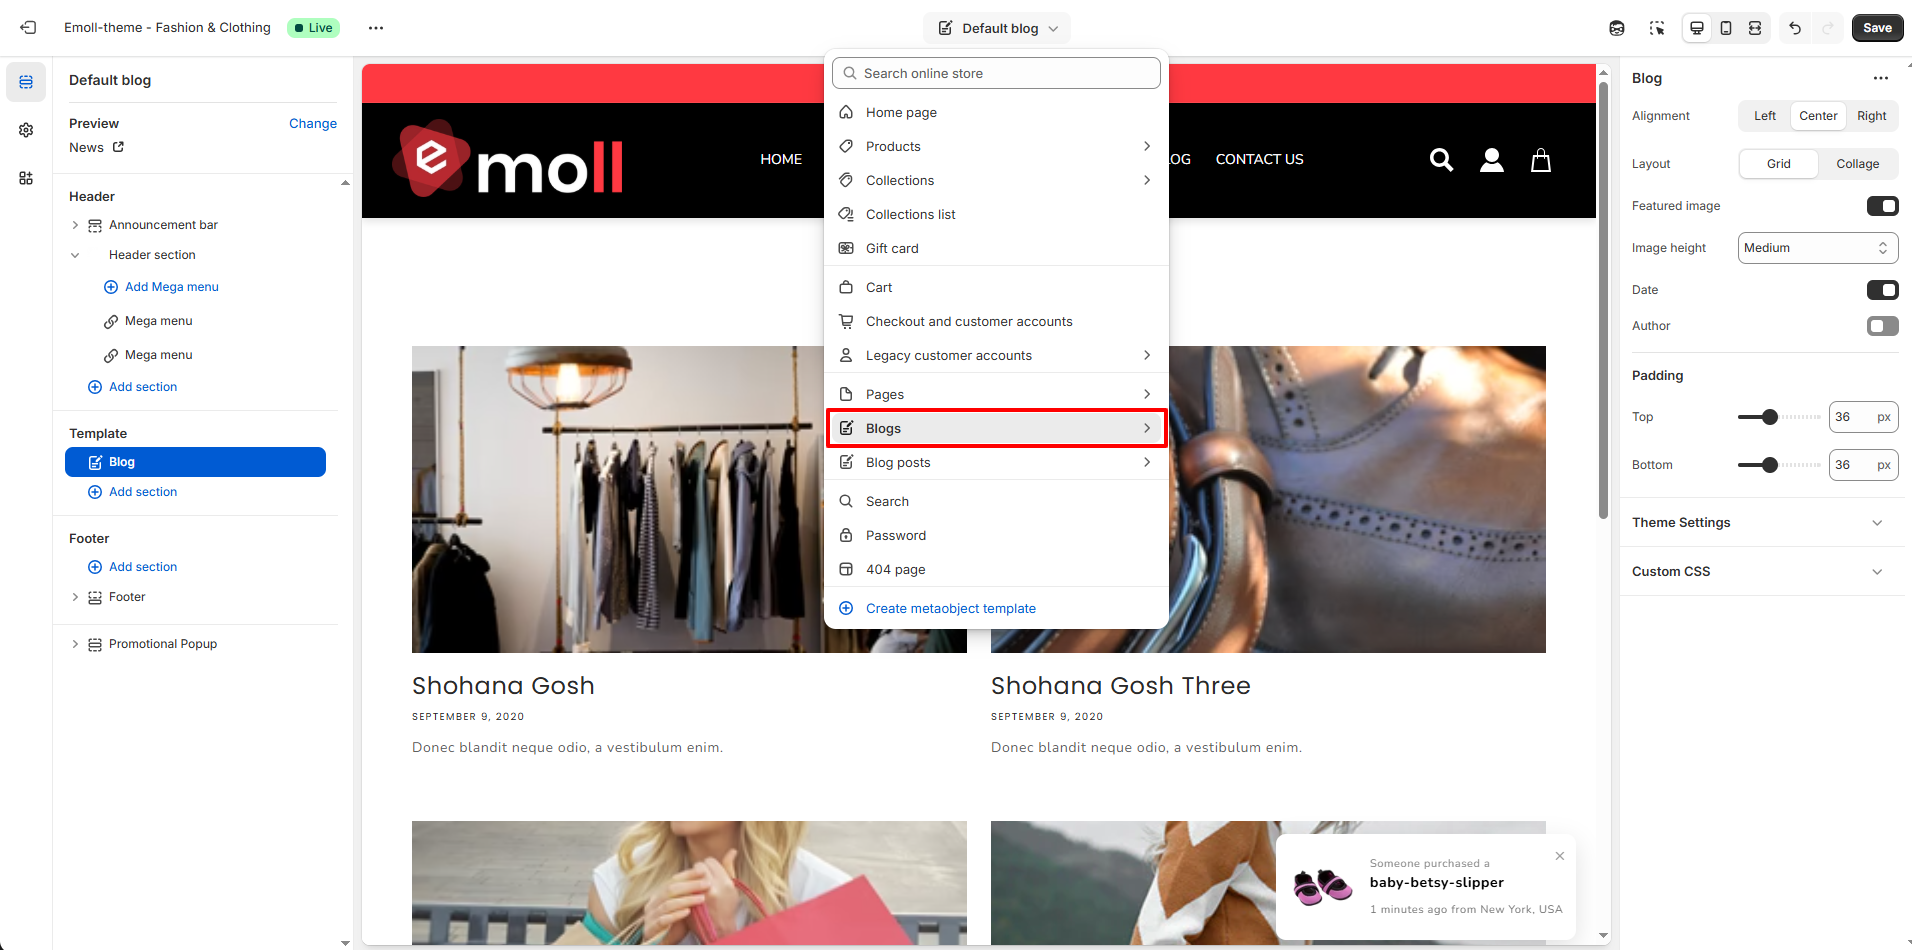
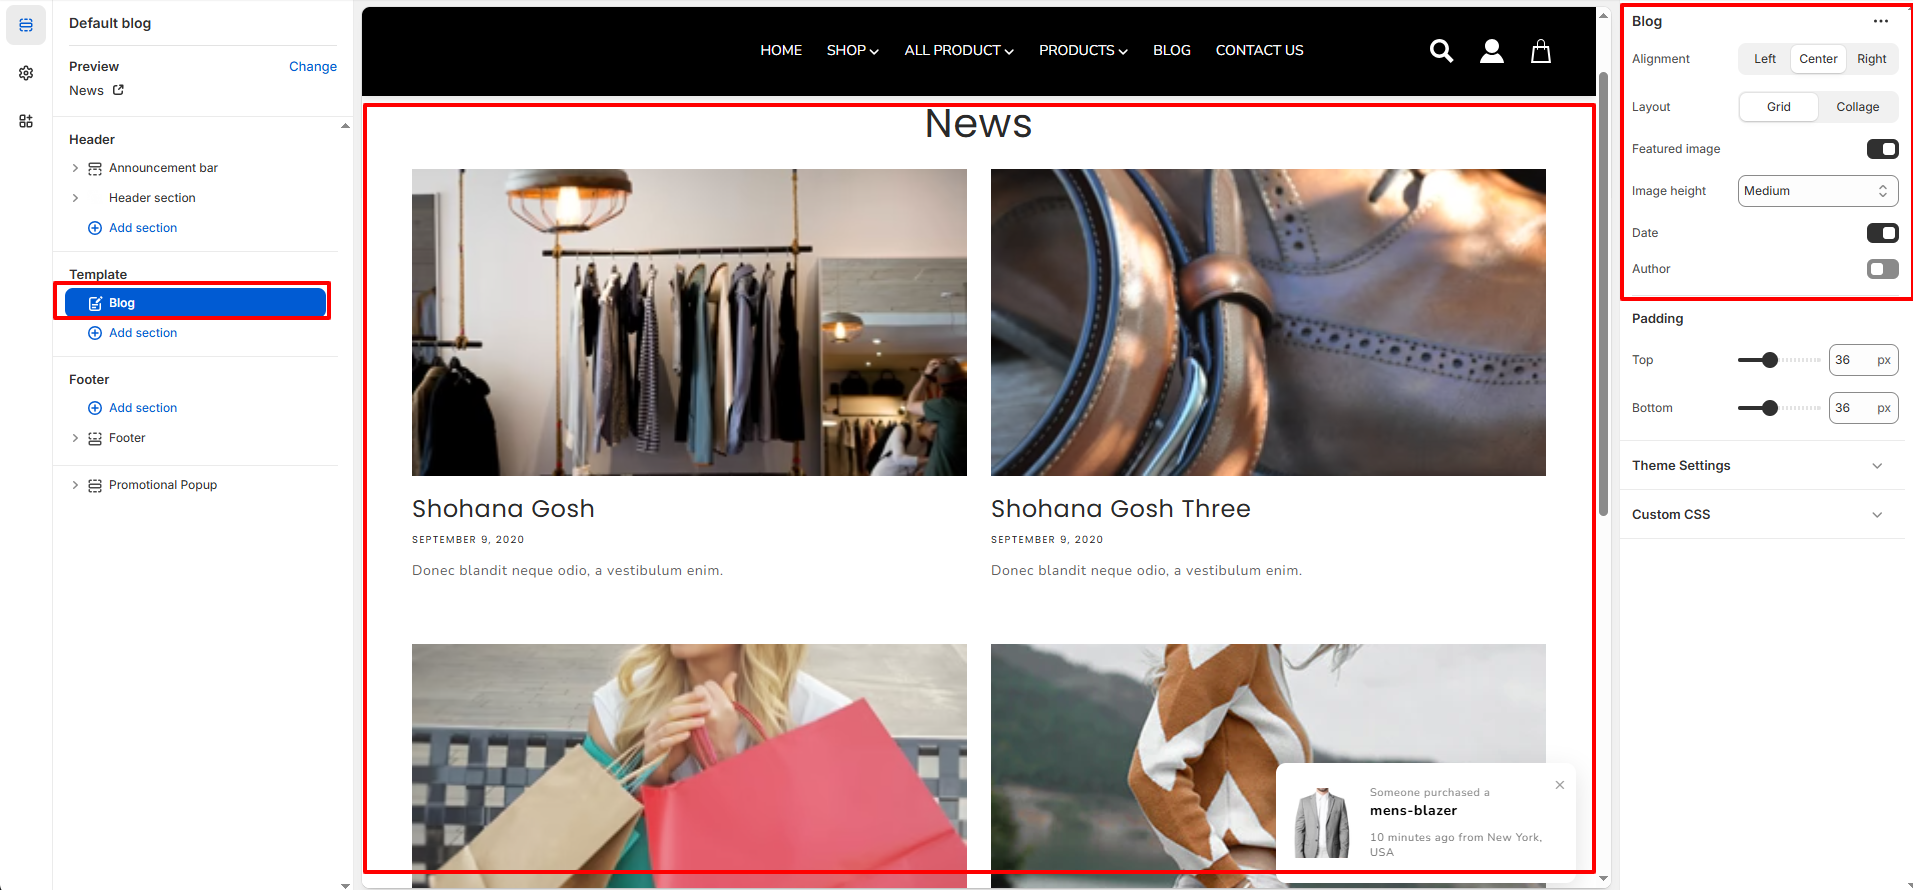
2. Blog Layout Settings
- Alignment: Control the alignment of the blog page heading.
- Left
- Center
- Right
- Layout: Choose how blog articles are displayed.
- Grid: Displays blog posts in a multi-column grid layout.
- Collage: Displays blog posts in a mixed or styled layout with varied image sizes.
- Featured Image: Enable or disable the blog post featured image display.
- Image Height: Control the height of blog featured images (Small / Medium / Large).
- Date: Show or hide the blog post publish date.
- Author: Show or hide the blog post author name.
3. Important Notes
- Make sure each blog post has a featured image for better visual layout.
- Use consistent image sizes for a clean grid appearance.
- Enable Date and Author for better content credibility.
- Always click Save after making changes.